If you love Notion as much as I do, you probably use it for everything, so why not Vision Boards?
Let’s learn How To Make a Vision Board on Notion TODAY!
With this app, you can make a vision board that’s truly unique and inspires you to take action. A big plus is, of course, if your whole life is on it and you are already used to checking it daily.
From choosing the perfect layout for your board to adding quotes and images that represent your goals and dreams, this article will show you how to create a vision board on Notion in just a few simple steps.
Take some time to personalize it, customize its appearance, and share it with others. Your journey of goal-setting begins here.
Meanwhile, check out our general step-by-step guide on how to make a vision board here.
How to Make a Vision Board on Notion in 6 Steps:
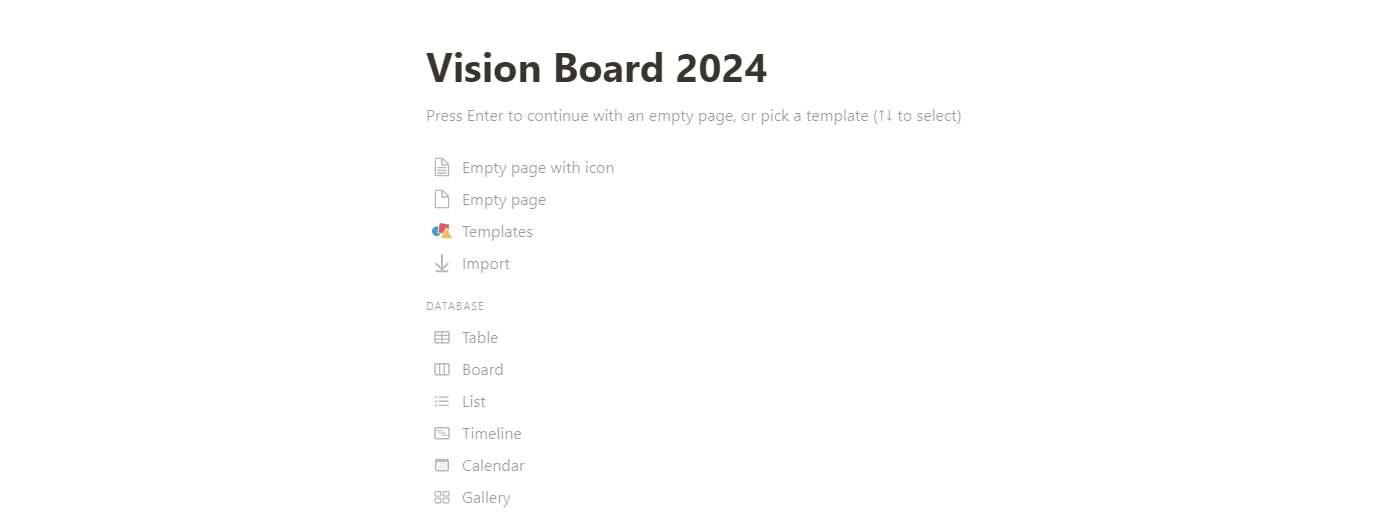
- Open Notion and create a new page or database. You can do this by clicking on the “+ New Page” button in the left sidebar or by typing “/” into the existing page and choosing a “Page” or “Database.”
- Choose a layout for your vision board. Notion offers several different layout options, including Table, (Kanban) Board, List, Timeline, Calendar, and Gallery. Select the layout that best fits your needs. Then chose “+ New Database”.
- Add your vision board items to the page or database. Depending on your chosen layout, you can add new pages or entries. You can also use the “Add Property” button to add additional fields to each item, such as a description, image, or date.
- Customize the appearance of your vision board. You can use the “Layout Settings” (three dots in the top right corner) menu to change the layout, sorting, filter, card preview and size, whether to color columns and more. These options will depend on the layout you chose.
- Share your vision board with others. If you want to share your vision board with others, you can use the “Share” button to invite others to view or edit your vision board. You can also use the “Export” button to export your vision board as a PDF, image, or other file formats.
- Review and update your vision board regularly. It’s a good idea to review your vision board regularly to track your progress and make any necessary updates. You can use the “Tags” feature to organize your vision board items by category or priority, and “Filters” to view only specific items.
TIP: You can always add multiple views for your databases to track progress in different ways!
To create a Kanban vision board in Notion, follow these steps:
- Open Notion and create a new page or database. You can do this by clicking on the “+” icon in the left sidebar or by typing “/” into the existing page and choosing a “Page” or “Database.”
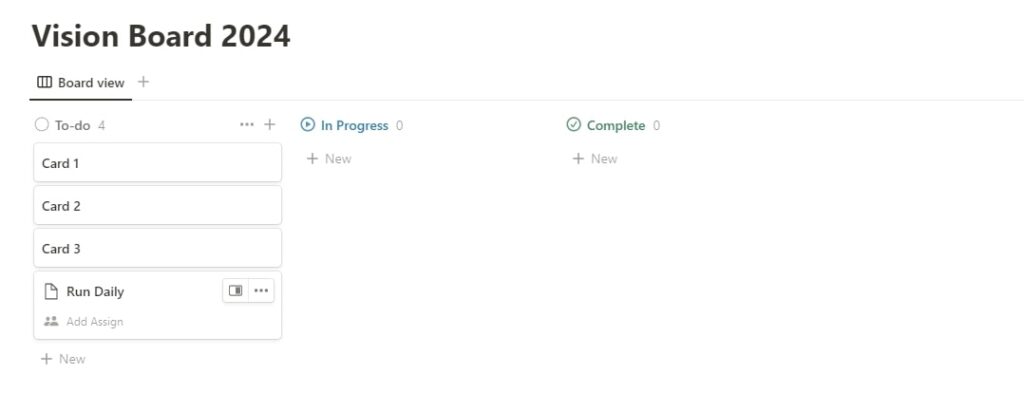
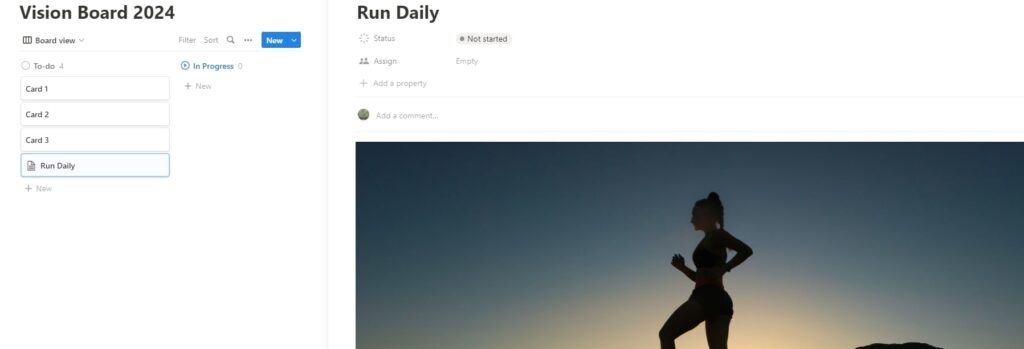
- Choose the “Board” layout, then add an existing database or choose “+New database”. This will create a grid with three columns: “To Do,” “In Progress,” and “Complete.” You can change these names later.
- Add your vision board items to the Kanban board. You can do this by clicking on the “+” icon in the “To Do” column and adding a new page or entry. You can also open the item to add additional fields to each item, such as a description, image, or date.
- In “edit view layout” setting (three dots, top right corner), you can go to Layout -> Card Preview to make page content visible (like the images you put inside). Also, you can change the card size, fit image, color columns, etc.

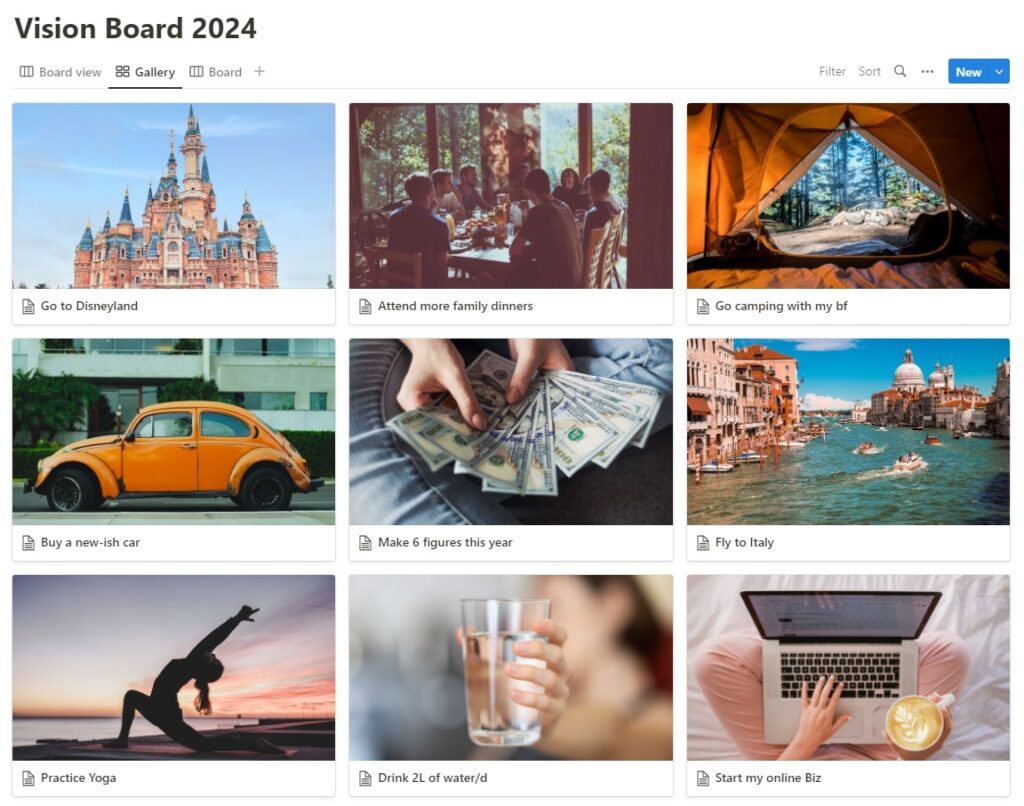
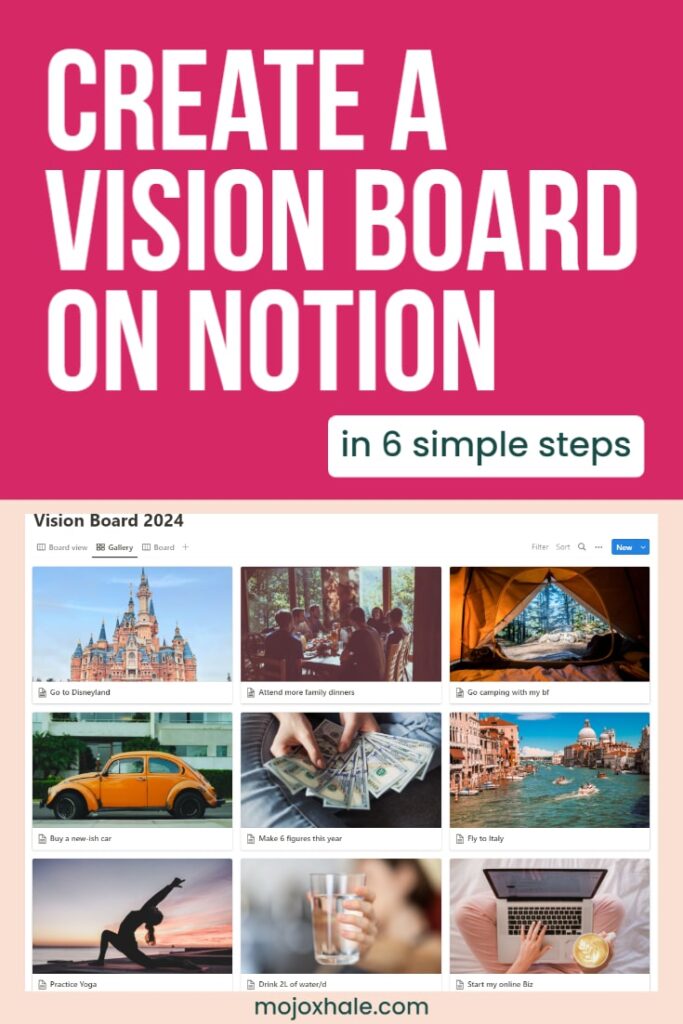
To create a Gallery vision board in Notion, follow these steps:
- Open Notion and create a new page or database. You can do this by clicking on the “+” icon in the left sidebar or by typing “/” into the existing page and choosing a “Page” or “Database.”
- Choose the Gallery layout. From the layout options, select “Gallery.” This will create a grid of tiles that you can use to display your vision board items.
- Add your vision board items to the Gallery. You can do this by clicking on the “+” icon and adding a new page or entry.
- Step 4 is the same as for the Board option.
- HOT TIP: You can also make a Vision Board with Pinterest! Or, at least, use it to find images for your Vision Board. Check out the linked article for more details on how to do just that!
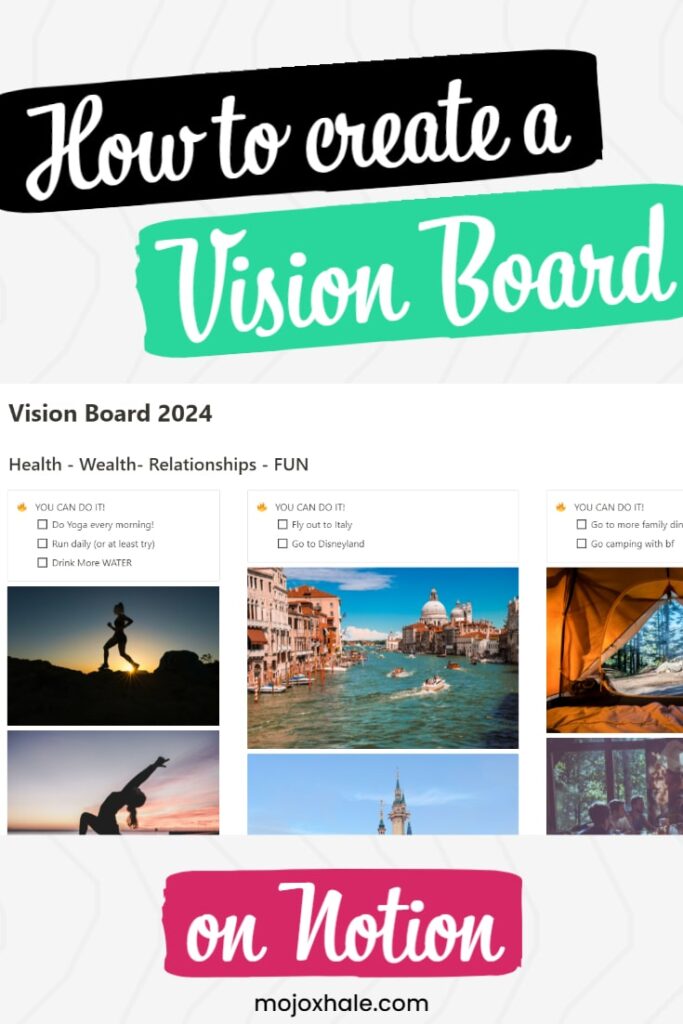
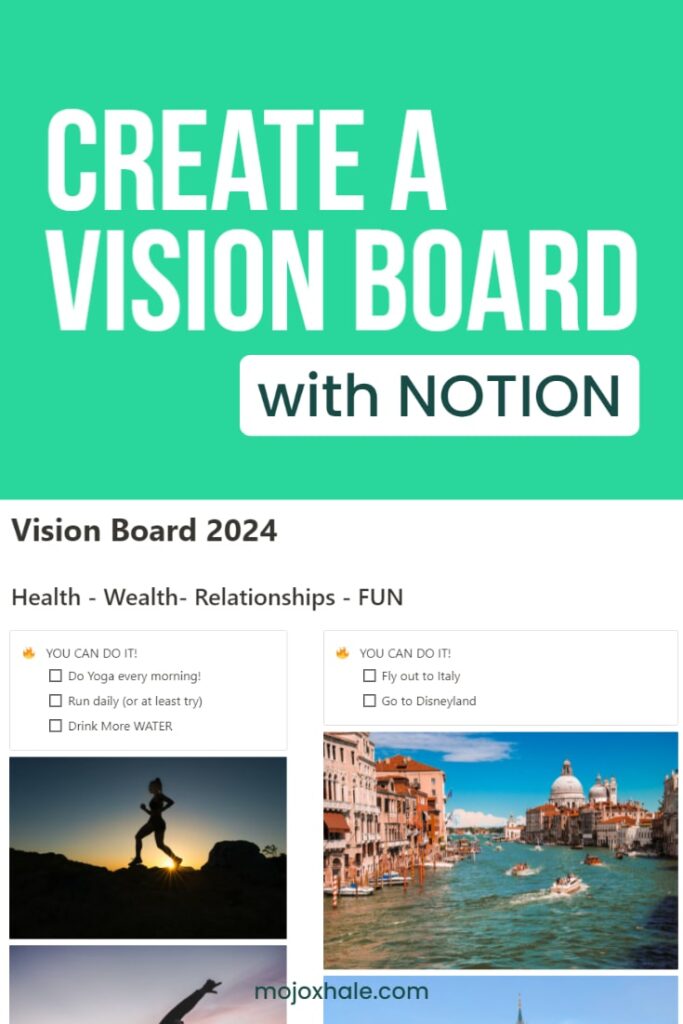
How to Make a Vision Board on Notion WITHOUT Databases
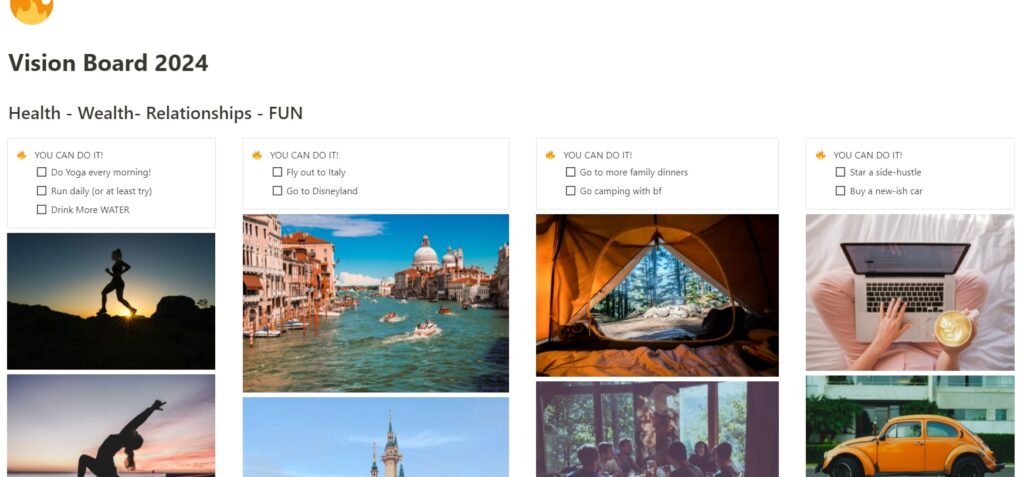
If you don’t want to create a new database with separate entries, you can always create a new “regular” page in Notion. Here you can turn a field into 2-5 columns and drop in your vision board images.
- add text and quotes for manifestations
- drop in art, photos, images
- add in checklists?
- Add callout sections
- And play around with this new, non-traditional way of making vision boards.
It’s all about your preferences!
I sort of prefer this way for a more visual vision board. But if you want to go the analytical round, databases, tags, and checklists can be more effective for tracking and organizing purposes.
Also, you can add some inspirational quotes to your vision board; check out the linked article for my 65 picks!
Use all Notion’s features to track Vision Board Progress
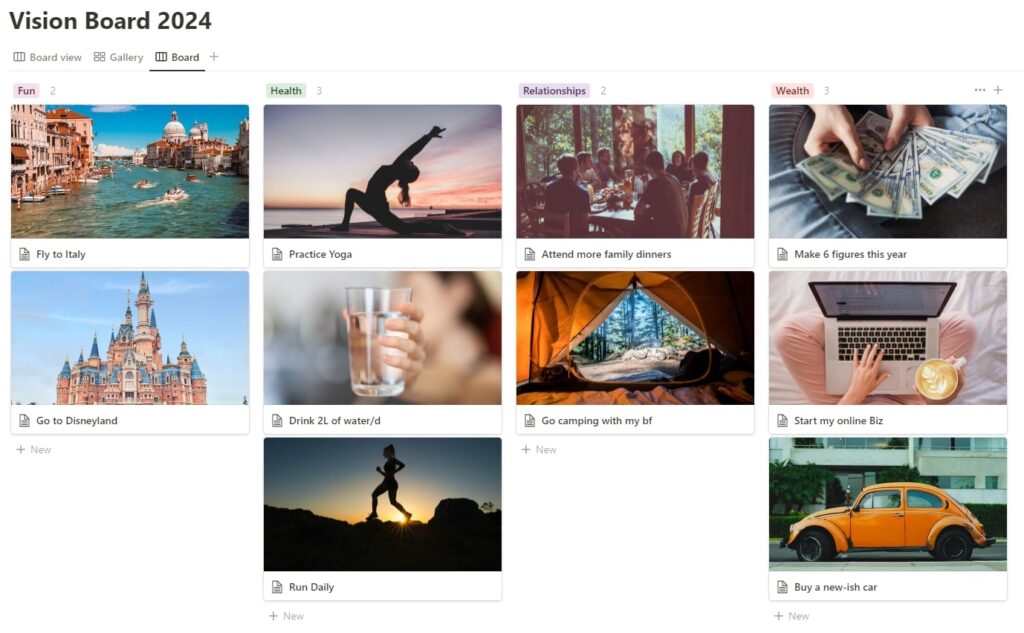
Use Categories.
Create a new “Select” property in Notion to categorize your visions. This way you can then sort them and see which part of your life you worked on the most in the past year.
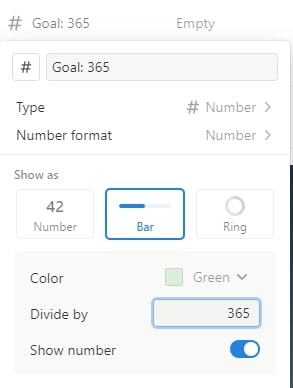
Use the “Number” feature to keep track of how many times you’ve done a single task.
This one works well if you want to, for example, run daily. You can even show it as a progress bar!
Use the “Checkbox” feature to check off the things you’ve already accomplished. Tracking your progress will help you keep going!
- HOT TIP: You can also make a vision board using Canva for free! Check out the linked article to learn how to do it and make one as wallpaper or for print.
FAQ
1. Can I make a vision board on Notion?
Absolutely!
With Notion’s vision board builder, you can easily create a visual representation of your goals and aspirations. Choose a layout that best suits your needs and start customizing with quotes, images, and other elements that will help keep you inspired.
Best of all, Notion’s features make these vision boards very functional. Once you’re done crafting it, share it with others or keep it private – the choice is yours.
2. How do you make a vision board template in Notion?
Follow the steps described at the beginning of the article to create your vision board. Now you can duplicate it to re-use as a template.
3. Where can I find free Notion vision board templates?
There are many great resources for finding free Notion templates, including the Notion Template Gallery. The Template Gallery is a collection of templates created by the Notion community that you can use to get started with your own vision board or other projects.
You can access the Template Gallery by clicking on the “templates” button in the left sidebar or by visiting the Notion Template Gallery website.
In addition to the Template Gallery, you can also find free templates by searching online or by asking for recommendations from other Notion users.
4. What is the best layout for a vision board on Notion?
When it comes to creating a vision board in Notion, there are several different layout options to choose from. So, what is the best layout for a vision board?
It really depends on your personal preference and the specific needs of your vision board. Here’s a quick overview of the different layout options available in Notion and their unique features:
- Kanban: The Kanban layout is a great option for those who want to track the progress of their goals. It consists of three columns: “To Do,” “In Progress,” and “Complete.”
You can add your vision board items to the appropriate column and move them between them as you progress.
Or, you can change the names of these columns to represent the different topics of your vision board and organize them this way. You can also add more columns. - Calendar: The Calendar layout is a great choice for those who want to track their goals on a timeline. It displays your vision board items as events on a calendar, making it easy to see when each goal is due or scheduled.
- Gallery: The Gallery layout is a flexible option that allows you to display your vision board items as tiles in a grid. You can customize the size and appearance of the tiles and arrange them in any order you choose.
Ultimately, the best layout for your vision board will depend on your personal preference and the needs of your goals. Experiment with different layouts to see which one works best for you.
You can always switch to a different layout later if you find that one isn’t working for you.
Personally, I prefer the Board and the Gallery layouts, as well as the plain old regular page without databases.
And that’s how to make a vision board on Notion. Hope this helped!